hunter ceiling fan instruction manual
Hunter Ceiling Fan Instruction Manual: A Comprehensive Guide
Welcome! This manual delivers complete instructions for installing and operating your new Hunter ceiling fan‚ ensuring years of comfort and reliable performance within your home or office.
Understanding Your Hunter Ceiling Fan
Congratulations on selecting a Hunter ceiling fan! These fans are designed to enhance comfort and air circulation in any room. This section provides a foundational understanding of your new fan‚ preparing you for a smooth installation and operation experience. Hunter fans come in various styles and configurations‚ including models with and without integrated light fixtures.
Before you begin‚ familiarize yourself with the fan’s intended use and features. Understanding the different components and their functions will greatly simplify the installation process. Hunter offers a wide range of fans suitable for diverse spaces‚ from bedrooms and living rooms to offices and patios. This manual is your guide to unlocking the full potential of your Hunter fan‚ ensuring years of reliable and efficient performance. Remember to consult the specific instructions for your model.
Fan Components and Identification
Let’s identify the key parts of your Hunter ceiling fan. Core components include the motor housing‚ which contains the fan’s motor and mounting hardware. You’ll also find fan blades‚ designed to move air efficiently‚ and a mounting bracket‚ crucial for secure ceiling attachment. Many models feature a light kit‚ encompassing the light fixture‚ glass shades‚ and associated wiring.
Additional parts may include pull chains for speed and light control‚ a remote control receiver (if applicable)‚ and a downrod‚ used to adjust the fan’s height. Familiarize yourself with the TM ball assembly and associated hardware for proper installation. Identifying each component before starting will streamline the process. Refer to the parts diagram included with your fan for a visual guide. Knowing these parts ensures a successful and safe installation.
Safety Precautions Before Installation
Prioritize safety! Before beginning‚ always disconnect the power supply at the circuit breaker or fuse box. Ensure the electrical circuit is properly grounded. Never work with electricity if you are uncomfortable or unfamiliar with electrical procedures – consult a qualified electrician. Verify the ceiling structure can support the fan’s weight; improper mounting can lead to falls and injuries.
Read all instructions thoroughly before assembly. Use appropriate safety glasses to protect your eyes during installation. Keep small parts away from children. Do not attempt modifications to the fan. Ensure the fan blades are securely attached before operation. If using a ladder‚ ensure it’s stable and positioned correctly. Following these precautions will help prevent accidents and ensure a safe installation process.
Installation Process
Begin the setup! Carefully follow these steps to properly install your Hunter ceiling fan‚ ensuring a secure and functional addition to your living space.
Preparing for Installation: Tools and Checklist
Before you begin‚ gather all necessary tools for a smooth installation process. You will likely need a screwdriver (Phillips and flathead)‚ wire strippers‚ wire connectors‚ electrical tape‚ pliers‚ a ladder‚ and a voltage tester – crucial for safety!
Essential checklist items include: verifying the ceiling junction box is rated to support the fan’s weight‚ confirming the power is OFF at the breaker‚ and having all fan components readily available. Double-check you have the mounting bracket‚ fan blades‚ motor housing‚ light kit (if applicable)‚ and remote control receiver (if applicable).
Safety first! Ensure you understand local electrical codes and‚ if unsure‚ consult a qualified electrician. A well-prepared workspace and a complete toolset will significantly simplify the installation and minimize potential issues.
Installing the Mounting Bracket
Begin by securely attaching the mounting bracket to the ceiling junction box. Ensure the box is firmly supported and rated for the fan’s weight – this is paramount for safety. Use the screws provided with the bracket‚ tightening them firmly against the box.
Verify the bracket is flush against the ceiling‚ as indicated in installation diagrams. For angled ceilings‚ utilize an appropriate angled mounting adapter‚ ensuring it’s correctly aligned. A properly installed bracket forms the foundation for a stable and wobble-free fan operation.
Double-check all connections before proceeding. A loose bracket can lead to significant issues later. Refer to the included diagrams for specific bracket installation details related to your fan model.
Wiring the Ceiling Fan
Before commencing wiring‚ absolutely disconnect the power supply at the circuit breaker. Identify the fan’s wires – typically black for hot‚ white for neutral‚ and green or bare copper for ground. Carefully connect these wires to the corresponding wires in the ceiling junction box‚ using wire connectors.
Ensure all connections are secure and that no bare wire is exposed. Improper wiring can create a fire hazard or damage the fan motor. Refer to the wiring diagram included with your fan model for precise instructions.
Proceed to grounding the fan (detailed in the next section) before fully enclosing the wiring within the mounting bracket. Double-check all connections before restoring power.
Connecting the Fan Motor to the Power Supply
Carefully raise the fan motor assembly and align the wires from the fan with the corresponding wires extending from the mounting bracket. Typically‚ this involves matching black (hot) to black‚ white (neutral) to white‚ and the ground wire (green or bare copper) to the ground wire.
Utilize appropriately sized wire connectors to securely join the wires‚ ensuring a tight and reliable connection. Avoid twisting bare wires together directly. Gently tuck the connected wires into the junction box‚ being careful not to pinch or damage them.
Confirm all connections are snug and that no exposed wire is visible before proceeding. A loose connection can cause the fan to malfunction or create a safety hazard.
Grounding the Fan for Safety
Proper grounding is crucial for preventing electrical shock and ensuring safe operation of your Hunter ceiling fan. The fan’s ground wire‚ typically green or bare copper‚ must be securely connected to the grounding wire in the electrical box.
Verify the electrical box is itself properly grounded. If unsure‚ consult a qualified electrician. Use a grounding screw or wire connector specifically designed for grounding purposes to establish a solid connection.
Never disconnect or bypass the grounding wire. This compromises the fan’s safety features. A correctly grounded fan will safely channel electrical faults to the ground‚ minimizing risk. Double-check the connection before fully enclosing the wiring.
Attaching the Fan Blades
Begin by carefully unpacking the fan blades and inspecting them for any damage. Each blade should be attached to a blade bracket using the provided screws. Ensure the screws are tightened securely‚ but avoid over-tightening‚ which could strip the screw holes or damage the blade.
Next‚ align each blade bracket with the corresponding mounting point on the fan motor housing. Gently push the blade bracket onto the motor housing post until it’s firmly seated. Secure each blade bracket with the appropriate screws‚ again tightening firmly but cautiously.
Repeat this process for all remaining blades‚ ensuring each is securely attached. A wobble-free operation depends on correctly installed blades.
Assembling the Fan Motor Housing
Carefully unpack all components of the fan motor housing‚ checking against the parts list to ensure everything is present. Begin by attaching the upper canopy to the motor housing‚ securing it with the provided screws. Ensure a snug fit‚ but avoid over-tightening.
Next‚ slide the downrod (if applicable) through the canopy and into the motor housing. Secure the downrod with the provided pin and set screw‚ ensuring it’s firmly locked in place. This is a critical step for safe and stable operation.
Finally‚ attach the lower canopy to the motor housing‚ concealing the wiring compartment. Secure it with the remaining screws. Double-check all connections to ensure the motor housing is fully assembled and secure before proceeding to the next installation step.
Operating Your Hunter Ceiling Fan
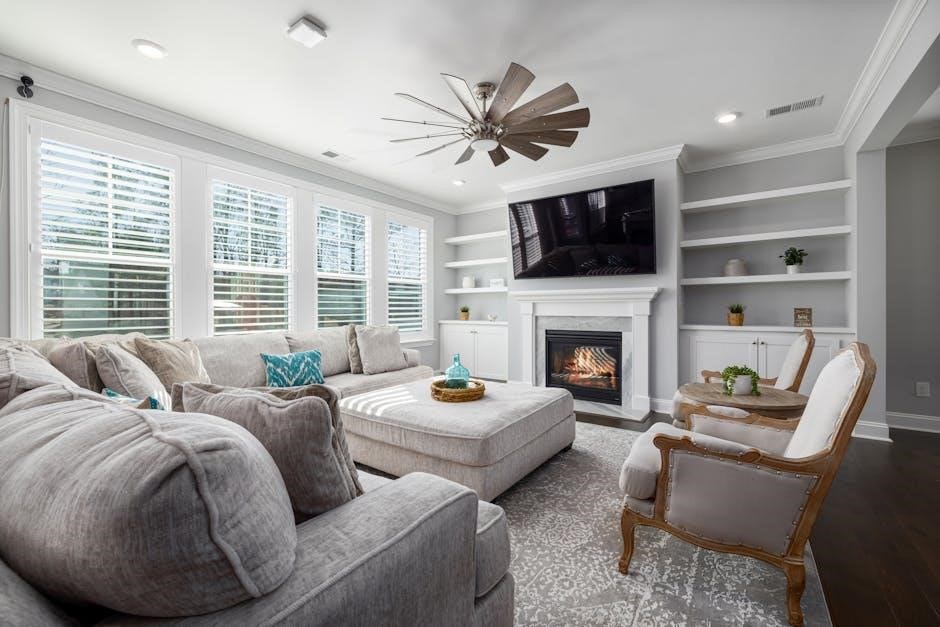
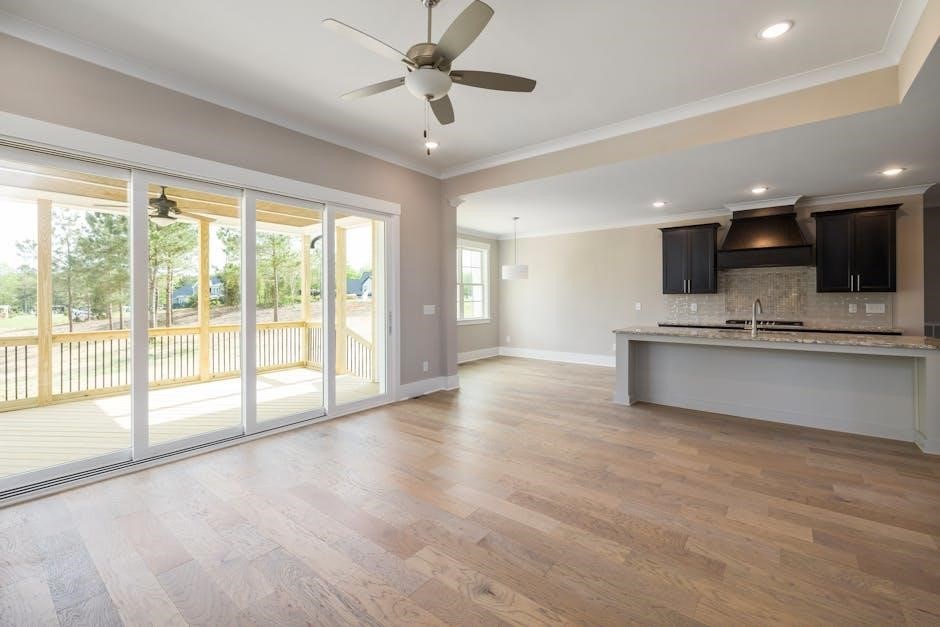
Enjoy! Your Hunter fan offers convenient control via pull chains or a remote (if included)‚ allowing adjustments to speed and direction for optimal comfort.
Using the Pull Chains
Simple Control: Most Hunter ceiling fans utilize pull chains for straightforward operation. Typically‚ one pull chain controls the fan’s speed – offering selections like low‚ medium‚ and high – while a separate chain manages the integrated light fixture‚ if your model includes one.
To cycle through the fan speeds‚ gently pull the speed control chain. Each pull will advance to the next speed setting. For the light‚ a single pull will turn the light on‚ and another pull will turn it off.
Important Note: Avoid excessive or forceful pulling‚ as this could potentially damage the pull chain mechanism. Ensure the chains swing freely and are not obstructed. Familiarize yourself with the specific chain functions for your fan model‚ as configurations can vary slightly.
Remote Control Operation (If Applicable)
Convenient Control: If your Hunter ceiling fan includes a remote control‚ it offers convenient‚ wireless operation. The remote typically features buttons for power‚ fan speed adjustment (low‚ medium‚ high)‚ and light control (on/off‚ dimming if supported).
Pairing & Batteries: Ensure the remote is properly paired with your fan – consult the separate remote control instruction sheet for pairing procedures. Always use fresh batteries of the correct type to guarantee optimal performance. Point the remote directly at the fan’s receiver when operating.
Advanced Features: Some remotes offer additional features like a sleep timer or a “breeze” mode‚ simulating natural wind patterns. Refer to your remote’s manual for a complete understanding of its capabilities.
Reversing the Fan Direction
Seasonal Comfort: Hunter ceiling fans offer a reversible motor‚ allowing you to adjust airflow for optimal comfort throughout the year. In summer‚ the counter-clockwise direction creates a downdraft‚ providing a cooling breeze.
Switch Location: Locate the reversing switch‚ typically found on the fan motor housing. It’s usually a small slider switch. To reverse the direction‚ simply slide the switch to the opposite position while the fan is off.
Winter Mode: During winter‚ set the fan to rotate clockwise (on low speed) to gently circulate warm air trapped near the ceiling‚ improving heating efficiency and reducing energy costs; Always ensure the fan is off before changing the direction.
Adjusting Fan Speed Settings
Controlling Airflow: Hunter ceiling fans typically offer multiple speed settings to customize airflow to your preference. These settings are usually controlled via pull chains‚ or‚ if equipped‚ a remote control.
Pull Chain Operation: Most fans utilize pull chains – one controls the light (if present)‚ and another controls the fan speed. Each pull typically cycles through the available speeds: Low‚ Medium‚ and High. Continue pulling to reach your desired setting.
Remote Control Options: If your fan includes a remote‚ consult the remote’s specific instructions for speed adjustment. Remote controls often feature dedicated buttons for each speed level‚ offering convenient control from anywhere in the room. Experiment to find the perfect balance of comfort and energy efficiency.
Maintenance and Troubleshooting
Keep it Running Smoothly: Regular cleaning and addressing minor issues will ensure your Hunter ceiling fan continues to provide optimal performance for years to come.
Cleaning Your Ceiling Fan
Maintaining a Pristine Fan: Regular cleaning is crucial for optimal performance and longevity of your Hunter ceiling fan. Before beginning‚ always ensure the fan is switched off – either at the wall switch or breaker – to prevent accidental operation. Dust accumulation can significantly reduce airflow and cause imbalance‚ leading to wobbling.
Use a soft brush or microfiber cloth to gently wipe down the fan blades‚ starting from the base and moving towards the tip. For stubborn dirt‚ a slightly damp cloth with mild detergent can be used‚ but avoid excessive moisture.
The fan motor housing can also be cleaned with a damp cloth. Pay attention to the light fixture (if applicable)‚ carefully wiping the glass or plastic components. Avoid using abrasive cleaners or solvents‚ as these can damage the finish. Periodically tightening the screws will also help maintain stability and prevent noise.
Troubleshooting Common Issues
Addressing Fan Concerns: If your Hunter ceiling fan isn’t performing as expected‚ several common issues can be easily resolved. Fan Doesn’t Start: First‚ verify the power supply – check the breaker and wall switch. Ensure all wiring connections are secure‚ referencing the wiring diagram in the installation manual. Fan Wobbles Excessively: Tighten all blade screws and the mounting bracket.
Use a balancing kit (often included) to correct imbalances. If wobbling persists‚ confirm the downrod and canopy are securely attached.
For other problems‚ double-check the remote control batteries (if applicable) and ensure proper operation. If issues continue‚ consult a qualified electrician. Remember safety first – always disconnect power before attempting any repairs.
Fan Doesn’t Start
Troubleshooting a Non-Starting Fan: If your Hunter ceiling fan fails to operate‚ begin with the simplest checks. Verify Power: Ensure the circuit breaker controlling the fan hasn’t tripped. Confirm the wall switch is in the “on” position. Check Wiring: Carefully inspect all wiring connections within the fan’s housing and at the electrical junction box. Refer to the wiring diagram provided in your installation manual to confirm correct connections.
Remote Control: If using a remote‚ replace the batteries and ensure it’s properly paired with the fan. A loose connection or faulty remote can prevent operation. If problems persist‚ consult a qualified electrician for assistance.
Fan Wobbles Excessively
Addressing Fan Wobble: Excessive wobbling indicates an imbalance. Blade Balance: Utilize the included balancing kit. Attach the clip to various blades‚ testing for reduced wobble. Add weights as needed to achieve smooth operation. Blade Tightness: Ensure all blade screws are securely tightened. Loose blades contribute significantly to wobble. Mounting Check: Verify the mounting bracket is firmly attached to the ceiling joist. A loose bracket exacerbates wobble.
Downrod Length: For longer downrods‚ ensure they are appropriately sized for the room and securely fastened. If wobble persists after these steps‚ consult a qualified electrician.
Replacing Light Bulbs
Bulb Selection: Always use bulbs with the correct wattage specified on the fan’s label or in the manual. Safety First: Before replacing bulbs‚ completely turn off the power to the fan at the circuit breaker or fuse box. Allow the bulbs to cool completely before handling to prevent burns. Accessing Bulbs: Carefully remove the light fixture’s glass cover (if applicable)‚ supporting it to prevent breakage.
Installation: Gently unscrew the old bulb and screw in the new bulb‚ ensuring it’s snug but not overtightened. Replace the glass cover‚ securing it properly. Restore power and test the light fixture. If the bulb doesn’t illuminate‚ double-check the bulb type and connection.
Tightening Loose Screws
Regular Checks: Periodically inspect your Hunter ceiling fan for any loose screws. This is crucial for maintaining safe and quiet operation. Power Off: Before tightening screws‚ always turn off the power to the fan at the circuit breaker to avoid electrical shock. Blade Holders: Check the screws securing the blade holders to the motor housing and tighten if necessary.

Mounting Bracket: Inspect the screws attaching the mounting bracket to the ceiling junction box and ensure they are firmly tightened. Canopy Screws: Tighten any screws on the canopy that may have loosened over time. Caution: Do not overtighten screws‚ as this could damage the components. A snug fit is sufficient.

Advanced Features & Options
Explore possibilities! Hunter offers extension downrods‚ angle mounting kits‚ and various mounting types – Profile‚ Standard‚ and Angled – for optimal fan placement.
Using Hunter Extension Downrods
Enhance airflow and aesthetics! Hunter extension downrods are ideal for rooms with higher ceilings‚ ensuring optimal air circulation and a visually appealing fan installation. Selecting the correct downrod length is crucial; consider your ceiling height and desired fan position.
Generally‚ a minimum of 7 feet from the floor to the fan blades is recommended for safety and efficiency. Downrods are available in various lengths to accommodate different ceiling heights. When installing an extension downrod‚ carefully follow the manufacturer’s instructions included with the downrod kit.
Ensure the downrod is securely fastened to both the motor housing and the mounting bracket. Always verify that all screws are tightened appropriately‚ but avoid overtightening‚ which could damage the components. Using an extension downrod may require longer wire connectors to ensure a safe and reliable electrical connection.
Angle Mounting Instructions
Adapting to Sloped Ceilings! When installing a Hunter ceiling fan on an angled or sloped ceiling‚ a specialized mounting adapter is typically required to ensure proper fan operation and stability. These adapters compensate for the ceiling’s angle‚ allowing the fan to hang vertically.
Carefully assess the ceiling’s slope angle to select the appropriate adapter. The adapter should be securely attached to the ceiling joist‚ providing a solid foundation for the fan. Follow the adapter manufacturer’s instructions meticulously during installation.
Ensure the downrod length is adjusted to maintain adequate blade clearance from the ceiling and surrounding objects. Proper angle mounting prevents excessive wobbling and ensures the fan operates safely and efficiently. Always double-check all connections and screws for tightness before operating the fan.
Understanding Different Mounting Types (Profile‚ Standard‚ Angled)
Choosing the Right Mount! Hunter ceiling fans accommodate various ceiling configurations with three primary mounting types: Profile‚ Standard‚ and Angled. Standard mounting is for flat‚ level ceilings‚ utilizing a standard mounting bracket directly attached to a ceiling joist.
Profile mounting‚ also known as flush mounting‚ is ideal for lower ceilings where a downrod isn’t feasible; the fan mounts directly against the ceiling. Angled mounting‚ as previously discussed‚ is for sloped ceilings‚ requiring a specialized adapter to ensure proper alignment and operation.
Selecting the correct mounting type is crucial for safety and performance. Always verify your ceiling’s structure can support the fan’s weight‚ and follow the instructions specific to your chosen mounting method. The manual details steps for each‚ ensuring a secure and wobble-free installation.